

IDX Charger Troubles? How to Replace a Fuse in Minutes!
Learn to quickly fix a common problem with the IDX JL-2Plus charger when the power supply light flashes orange, signaling a non-charging battery, with this easy-to-follow guide. Discover the simple solution of replacing a burnt-out fuse, a cost-effective and time-saving fix that ensures your equipment's safety and longevity. This article provides step-by-step instructions on identifying and replacing the fuse, recommending readily available replacement parts like the BOJACK 5x20mm 3.15A 250V fuse, and offers practical advice on keeping spare fuses handy to prevent future charging interruptions. A must-read for IDX JL-2Plus users to become self-sufficient in gear maintenance and avoid unnecessary downtime.
TIPS
11/27/20234 min read
We've all been there – you're out in the field and your back is aching from lugging around your bag, shoulders are stiff from booming. You can see the light at the end of the tunnel. Just have to get everything on the chargers and then…and then you see the light. Except is orange, and flashing. Your IDX JL-2Plus charger’s power supply light is flashing orange. Oh no the batteries aren't charging. Surely you brought the spare charger? Did you check your suitcase? Your car? A pang of horror sinks in as you remember you left it sitting in your gear room back at home. Great, now what?
Don't panic – this is a common hiccup, with an extremely simple solution, one that you’ve probably run into before without even realizing. The most common reason for this problem is that a fuse has burnt out on the charger or the fan has dislodged and the charger overheats. Either way, it’s a quick fix that will cost you at the most, $10 and about 10 minutes of your day. Today, we'll dive into a blown fuse.
Why Does This Happen?
You may be asking. Well to keep things brief, the fuse is a safety net, protecting the charger and batteries from being damaged from an improper flow of electricity. It’s better to have a fuse blow out rather than power surging through your charger and frying your batteries. Essentially, the fuse is doing its job and protecting your equipment which means that fuses will blow from time to time. You can read about the nitty gritty here.
Getting Started
Now that you know the why, it’s time for the what and the how. The what is everything you will need in order to make this repair including a replacement fuse, a tweaker (or some other small flat tool), and a pair of tweezers.
IDX lists the specs for the fuse as a 250V 3.15A fuse, that’s 20 mm in length. We recommend the BOJACK 5x20mm 3.15A 3.15amp 250V 0.2x0.78 Inch, which is available on Amazon in a 20 pack so you never have to worry about needing a replacement.
Safety First
First and foremost, make sure that the power switch is off, unplug the charger from the power source, and remove the AC cord from the input for ease of working. It may sound simple, but remember, you’re working with electrical fuses and getting zapped (even just a little bit) is never fun unless you're a sadist.
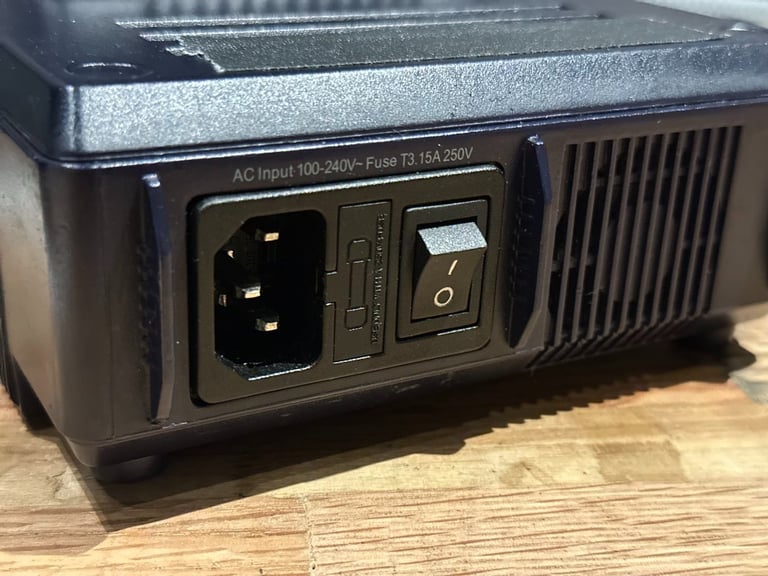
Now that you’re unplugged, it’s time to locate the fuse compartment on the IDX JL-2Plus charger. Unfortunately, for other brands of charger the manufacturer may have the fuse soldered onto the circuit board, making it nearly impossible to fix on the go, but for the IDX JL-2Plus this is not the case. On the back of the charger, between the AC input and the power switch you should see a small door with the icon pictured below. Using your trusty tweaker (or any small tool) pop the cover hiding the fuses.
The Surgery
Have you found the culprit? If so, excellent! If not, the other common issue is the fan becomes loose. In that case, hop over to our other article on resolving that problem (hint: it's also super easy!). Using your tweezers, gently remove the blown fuse from the compartment. The blown fuse should slide out easily by simply pulling it out with little to no force. Luckily, fuses are not a hazardous material and can be disposed of in the trash can. Toss that sucker!
You’re now ready to insert the new fuse. Remove the shiny, new fuse from its cover and pop it in the tab. You shouldn’t need any tools for this step. Make sure to reseal the fuse compartment door before doing any testing of the equipment. Ensure everything is snug and secure, like you found it. It's like tucking in your charger for a peaceful nap after a little adventure.
Trust, But Verify
Finally, plug the cord back into the AC port, connect your charger back to the power source and switch it on. Bask in your victory! Your Power LED should be glowing with a steady, normal color, indicating that your charger is ready to roll. It can’t get any easier than that.
It might be the first time that a fuse has blown on your charger, but unfortunately, it probably won’t be the last. Make sure to pick up a hearty supply from Amazon. A whole stash of fuses will run you less than $10, so throw a pack in your kit and never worry about being prepared again.
Congrats! You’ve successfully replaced a fuse, who knows what else you can learn? The first step to learning more is having a good teacher. Make sure to subscribe to articles like this one and become a gear guru today!
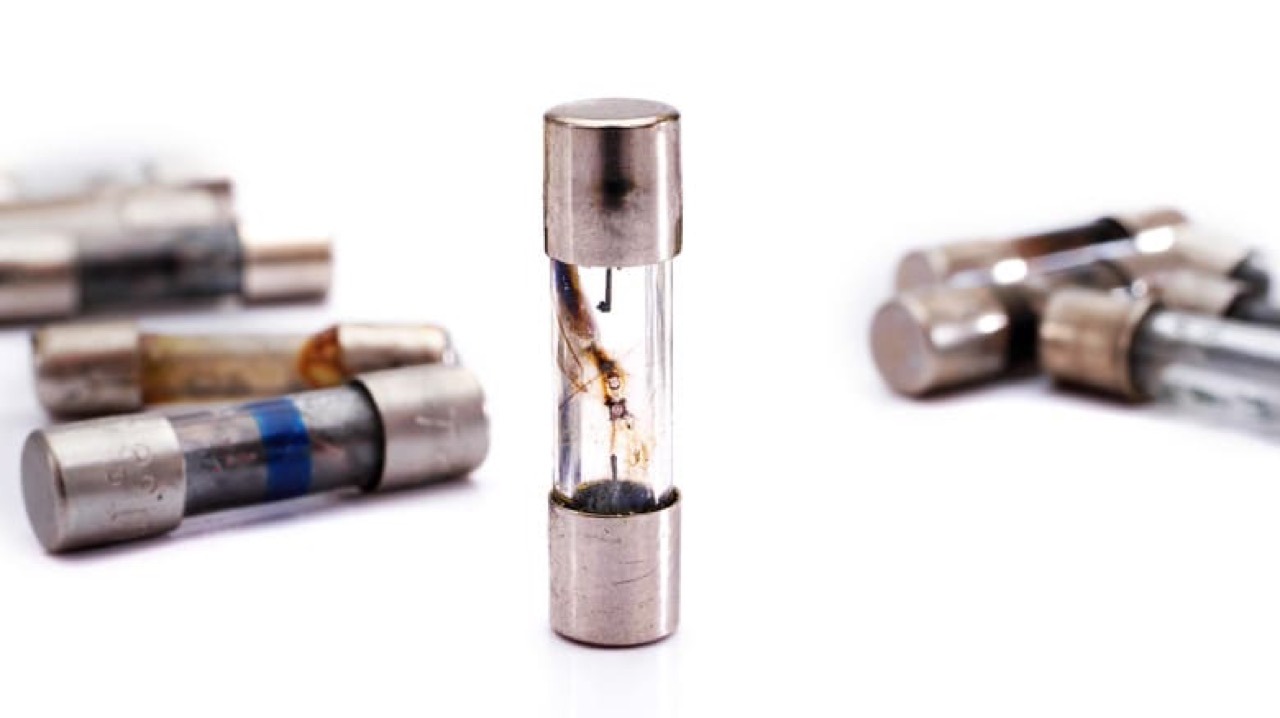
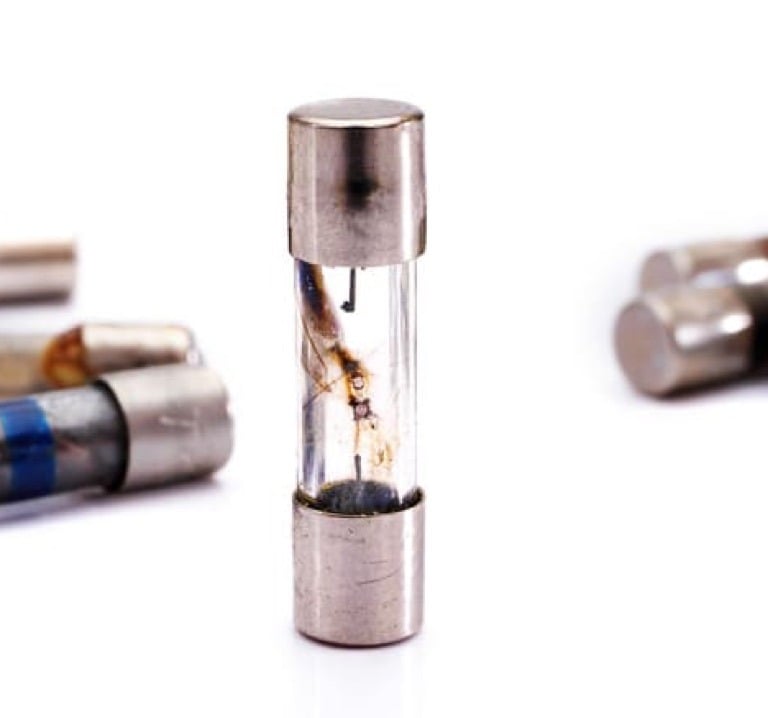
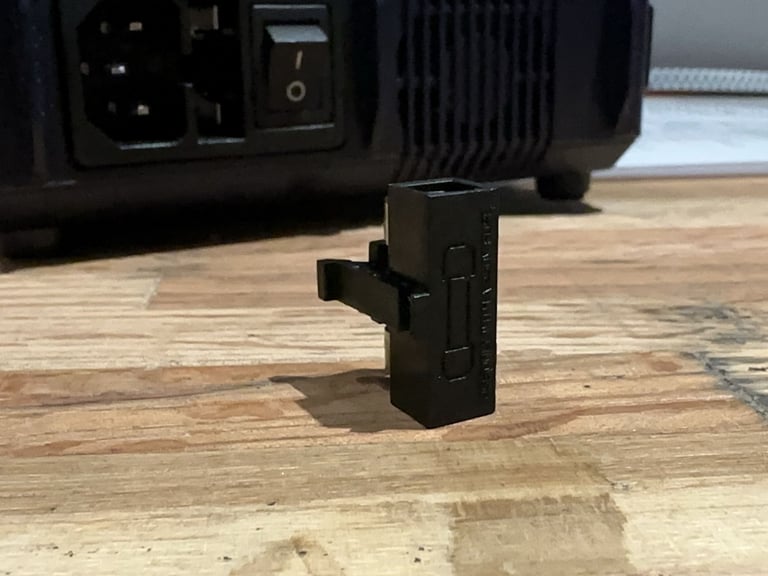
Inside the compartment you should see two fuses. Given what we know, a blown fuse happens when too much current passes through the wire filament inside, causing it to melt. Blown fuses will usually have a broken filament and a tell-tale smokey discoloration similar to what can be seen in the picture here.
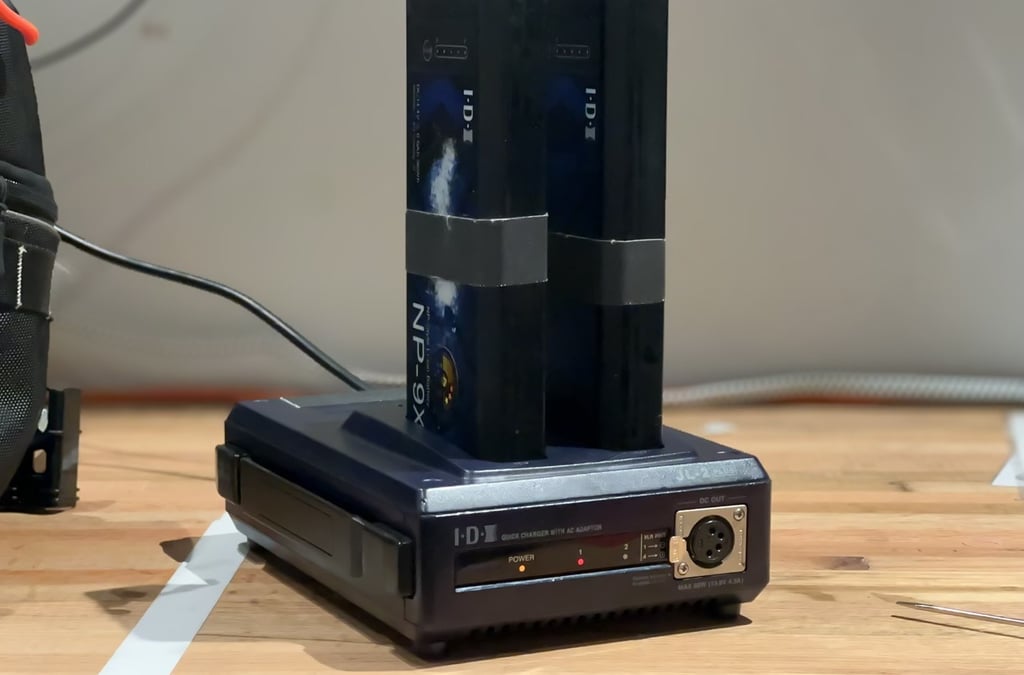
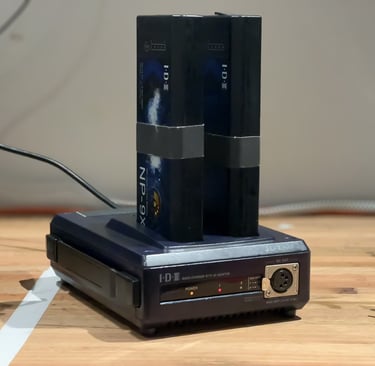
IDX JL-2 PLUS 2ch Sequential Li-Ion NP-Style Battery Charger
Get in touch
© 2025 Vandelay Sound Exports, Inc. • RETURN Policy • Privacy Policy • Terms and Conditions